Thursday, August 6, 2015

Tomato Herb Soup

In the summer when tomatoes are plentiful I am always looking for some really good recipes using tomatoes. I often plant tomatoes and love the Heirloom varieties but this year I failed to plant any at all. However, I have been finding some excellent Heirlooms at veggie markets and grocery stores in our area. For this recipe I wanted a mixture of Heirloom tomatoes.

 
Tomato Herb Soup is a recipe from one of my most favorite books. A recipe from P. Allen Smith's book, Seasonal Recipes From The Garden. You may be unfamiliar with P. Allen Smith but he is a gardener, landscape architect trained in England and has two homes in the Little Rock, Arkansas area. He also has written many gardening books and this cookbook is his first. Written in 2010 and I have used it often and have found his recipes to be excellent. This recipe was no exception, it is fabulous. I met Allen once at an antique show that I go to every year. He was there as a guest speaker and was very inspirational. I hope to some day visit his Moss Mountain Farm just outside of Little Rock.


Tomato Herb Soup
 
12 tablespoons (1 1/2 sticks) unsalted butter
 2 tablespoons extra-virgin olive oil
1 large onion, thinly sliced
8 fresh thyme sprigs, leaves removed
8 large fresh basil leaves, chopped
Salt and freshly ground black pepper to taste
2 1/2 pounds fresh tomatoes, peeled and cored
3 tablespoons tomato paste
1/3 cup all-purpose flour
1 quart chicken broth
1 cup heavy cream
Croutons, for garnish
 
Melt 8 tablespoons of the butter in a large saucepan, and mix in th olive oil. Then add the onions, thyme leaves, basil, and salt and pepper. Cook over medium heat, stirring occasionally, until the onions have wilted, about 5 minutes. Add the tomatoes and tomato paste, and stir to blend. Bring the mixture to a simmer, and continue to simmer for 10 minutes.
 
Place the flour in a small mixing bowl and add 5 tablespoons of the chicken broth stirring to blend. . Combine the flour mixture with the tomato mixture and add the remaining broth and simmer for 30 minutes, stirring frequently to prevent scorching.
 
Ladle the soup into a food processor and puree until smooth. Return the soup to the saucepan, and add the cream. Bring to a simmer, stirring occasionally. Mix in the remaining 4 tablespoons butter. The soup can be served either hot or cold, garnished with croutons.
 
My Note: I used my immersion blender instead of the food processor.
----------------------------------------------------------------------
 
 
I used my all-clad 5.5 quart dutch oven but would have liked to have used this little cutie that I purchased recently but it is only a 3 quart pot. But next week when I have friends for lunch I plan to serve this soup and I will warm it in my new Tomato Staub pot.
 
 
Anytime I have the opportunity to use fresh herbs from my garden it's always a plus in any recipe and the combination of flavors were excellent.
 
 
The aroma was absolutely heavenly with the butter, olive oil, onions, fresh thyme and basil. OMG, this should be "smell a vision" as Emeril would often say. This was one of those moments.


Of course, in our area of N FL we are sweltering with our heat and humidity but never the less, I served this soup hot.
 
 
Pared with a Caesar Salad and a glass of a French Rose' wine it made for a very satisfying and light dinner. I also gilded the lily a little and added a sprinkle or two of freshly grated Parmesan cheese, it was excellent. Mr. Picky Eater gave this soup a huge thumbs up.


I am linking this post to Foodie Friday hosted by Michael Lee at Rattlebridge Farm. To see other wonderful recipes shared just click HERE.
 
 
Hot or cold this Tomato Herb Soup is a keeper.


Wednesday, July 22, 2015

Chicken Mushroom Marsala Pasta

This was a recipe shared on a food message board that I belong to and this recipe sounded like something I would really like to try. I admit to changing it up just a bit to accommodate our tastes. I believe that this dish could easily be served for a dinner party.

I always prep all ingredients before preparing a dish.


This was a delicious and a quick and easy pasta dish.

Chicken Mushroom Marsala Pasta

1/2 pound ziti, cooked and drained according to package directions
1 tablespoon olive oil
1 pound Portobello mushrooms, sliced
salt and pepper to taste
1/4 cup dry Marsala wine
3 tablespoons unsalted butter
3 tablespoons all-purpose flour
1 1/2 cups unsalted chicken stock
3/4 cup parmesan cheese, separated
8 ounces mozzarella, cut into small cubes
3 tablespoons fresh flat leaf-parsley, chopped
2 chicken breast halves, roasted and cut into bite sized cubes (see note below)

Preheat oven to 350 degrees.

Cook pasta according to package directions, al dente. Drain and set aside.

In a separate sauce pan heat oil and add mushrooms. On medium heat sauté until the mushrooms are lightly browned. Add onions, salt and pepper and sauté until the liquid has evaporated. Add the marsala wine and cook until all liquid has evaporated. Add in butter, stir until melted and then add in flour cooking for a minute to a minute and a half. Slowly add chicken stock stirring constantly while scraping the bottom of the pan as you add the stock. Reduce heat to a simmer stirring constantly until the sauce thickens.

Add the pasta to the sauce and mix thoroughly. Then stir in 1/2 cup Parmesan, cubed mozzarella, fresh parsley and roasted chicken. Taste for seasoning and combine all ingredients. Pour into a buttered casserole topping the mixture with the remaining Parmesan. Bake for 25 to 30 minutes in pre-heated oven until lightly browned.

Note: Roast two chicken breast halves that have been salt and peppered and drizzled with a little olive oil in pre-heated 350 degree oven until done. About 20 to 25 minutes.

I always use baby Portobello's since I think they have so much more flavor than the white ones. You could also do a mixture of mushrooms for even more excellent flavor.


I think this recipe was originally to be a simple side dish but adding the Roasted Chicken certainly made it a main course.
 
My husband has never been one to eat much chicken but he certainly liked this dish. Paired with some simple Roasted Vegetables or even a Mixed Green Salad with a special dressing and you have wonderful Dinner Party Fare. I think the only thing missing would be a dessert and in my next post I will be sharing a quick and easy Blackberry Cobbler topped with some ice cream. I can't think of anything better to serve to put this dinner party fare right over the top.
 
I am linking this post to Foodie Friday hosted by Michael Lee at Rattlebridge Farm. Just click HERE to see lots of wonderful recipes shared.
 
I hope you will try this recipe, you won't be disappointed.

Carolyn


Monday, July 6, 2015

Blueberry Season

It is that time of year when blueberries are in season and soon to be ready to pick. I know we get blueberries in our super markets almost year round but there is nothing like the fresh taste of blueberries right off the bush.

We have numerous blueberry bushes at our farm in South Georgia and last checked they are almost ready for picking. We have so many blueberries that we share with any of our friends and family who want to come up and pick. The birds are enjoying them as well. I plan to pick as much as I can and freeze them for future use and plan to try as many blueberry recipes that I have time to prepare.

This particular bush being in full sun is always loaded with berry's. Another benefit of our farm is that my husband often plants sunflowers in the field beyond and the beauty sitting on our rocking chair front porch is amazing.
 
 
Recently I prepared a recipe that was shared by a  fellow blogger for a Lemon Blueberry Cake, Julie at Accounting For All My Blessings. I have made many cakes that were made with blueberries and lemon and most were like pound cakes. I've prepared them in many different ways but this is the first time I had prepared or even eaten a Blueberry Cake with a Cream Cheese frosting. This was one of the most amazing cakes I have ever eaten and my family just loved it.

 
Lemon Blueberry Layer Cake

1 cup unsalted butter, softened
1 1/4 cups granulated sugar
1/2 cup packed light brown sugar
4 large eggs
1 tablespoon vanilla extract
3 cups sifted all-purpose flour
1 tablespoon baking powder
1/2 teaspoon salt
1 cup buttermilk
Zest and juice from 3 medium lemons
1 1/2 cups fresh blueberries
1 tablespoon all-purpose flour

Cream cheese frosting
8 ounces cream cheese, softened
1/2 cup unsalted butter, softened
4 to 4 1/2 cups confectioners' sugar
1-2 tablespoons heavy cream
1 teaspoon vanilla extract

Preheat the oven to 350 degrees. Grease and lightly flour three 9x2-inch cake pans spraying each pan with baking spray. Note: you can use two cake pans, increase the baking time.

Using a mixer with a paddle attachment (or a handheld mixer), beat the butter on high until creamy, about 1 minute. Add granulated and brown sugars and beat on medium-high speed until creamed, about 2-3 minutes. Scrape down the side and bottom of the bowl as needed. Add eggs and vanilla. Beat on medium speed until everything is combined, about 2 full minutes. Scrape down the sides and bottom of the bowl as needed. Set aside.

In a large bowl, toss together the flour, baking powder, and salt. Slowly add the dry ingredients to the butter mixture. Beat on low speed for 5 seconds, then add the buttermilk, lemon zest, and lemon juice. Stir lightly until everything is just combined. Toss the blueberries in 1 tablespoon of flour and fold into the batter. The batter is thick, do not overmix as you will have a tough, dense cake!

Spoon batter evenly into the 3 prepared cake pans. Bake for about 21-26 minutes or until a toothpick inserted in the center comes out clean. Remove from oven and let cool on wire racks for 15 minutes. Invert cake onto racks and let cool completely before frosting.

To make the frosting, in a mixer bowl, beat cream cheese and butter together on medium speed until no lumps remain, about 3 minutes. Add 4 cups confectioners' sugar, 1 tablespoon cream, and vanilla extract, with the mixer running on low. Increase to high speed and beat for 3 minutes. Check for thickness, adding more confectioners' sugar if too thin or more cream if too thick. You want it spreadable.

Using a large serrated knife, trim the tops off the cake layers to create a flat surface. Place 1 layer on your cake stand. Evenly cover the top with frosting. Top with 2nd cake layer, more frosting, the 3rd cake layer. Top with frosting and spread around the sides. Top with blueberries and/or lemon garnish, as desired. Refrigerate for at least 45 minutes before cutting.
 ------------------------------------------------------------------------------

This was probably one of the BEST cakes I have ever made, any cake made with buttermilk is IMO outstanding. I think one of the things I liked most about it was the unique and wonderful texture.

My husband liked it so much he has already asked me to bake this cake again. It didn't last long in my house. I prepared this cake for a family dinner and everyone in our family just loved it including all the children. This cake is truly a keeper and I am so glad to have it in my repertoire. Thanks so much Julie for sharing this wonderful recipe.
If you happen to have some fresh blueberries on hand you should try this recipe. You won't be disappointed.
I didn't even get it properly decorated. This cake was still scrumptious even without the adornment of blueberries and lemon slices.


Linking to: Outdoor Wednesday and Foodie Friday at Rattlebridge Farm.


Wednesday, June 17, 2015

Limelight Hydrangeas

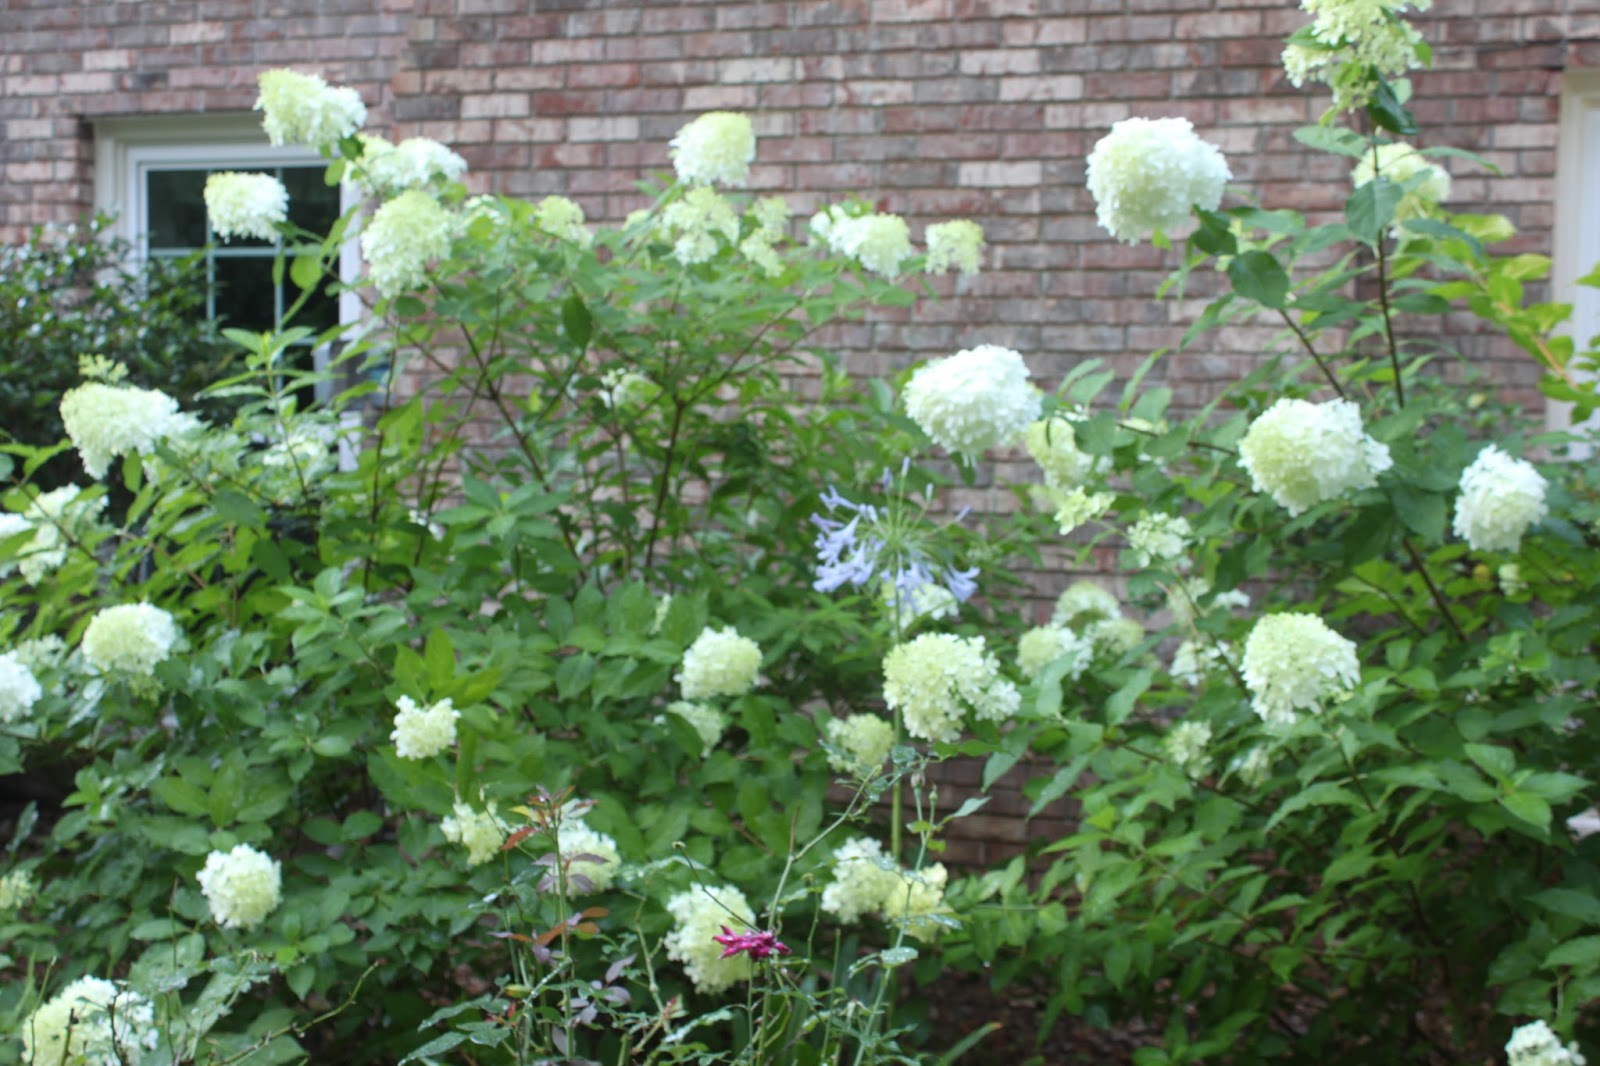
In most of the warmer climates around the country we're seeing our hydrangeas  putting on a summer show. I have many hydrangeas planted in my garden and I have some favorites. My favorite blooms to bring indoors to enjoy are Limelight Hydrangeas.

About two years ago I had an area in my garden that I needed to do some replanting. I chose to plant Limelight hydrangeas. These look very much like an Oak Leaf Hydrangea with it's pointed blooms but the Limelight's are a longer lasting bloom opening up a chartreuse green and the longer it remains on the bush it will turn white. Both work magnificently in an arrangement or just several in a vase of water. And, of course, the color goes in any room of my house.


They just cover themselves in blooms. I have three planted directly behind my house mixed in with some Heirloom Roses, antique daylilies and various other plant material. Limelights will provide me with several months of blooms to bring inside.


If your area is zoned for Limelight Hydrangeas I would suggest that you plant some in your garden. They will bring you a great deal of pleasure.


It's been a while since I have participated at this blogging party but today I am sharing this post at Outdoor Wednesday. To view other inspiring posts click HERE.


Thursday, June 11, 2015

A Spring Tablesetting

Earlier in the Spring, we are now in the heat of our North Florida summer, I did a table setting that I have never shared. I often like to mix patterns in terms of table cloths, china patterns, etc. but now enjoy a more simplistic table. There is a certain elegance and sophistication about "simple".
 I most always do my own flower arrangements. It's is a source of relaxation for me that I enjoy so much.
Over the years I have collected many containers for my flower arranging and the table wouldn't be complete without fresh flowers or some of my silver birds.
 
 Using the colors of the tablecloth I used a mixture of roses, carnations, lilies, snapdragons, and mums. Most all my greenery is cut from my garden. Most often my flowers would be cut from my garden but this particular time of year it was a little early for garden blooms.
 
Another collection I have used on this table are my antique silver napkin rings. I have collected these for several years, always sterling and most often European with a couple being from the USA.
 
 I most often choose ones with intricate designs with a lot of detail and those are usually from France but often from England.
 This one from Czarist Russia and my husbands favorite. I always place it where he would be sitting. The red enamel banded with seed pearls was a most unusual "find" and I could not pass it up. It's also gold over sterling silver as well.


 I often will choose to buy more masculine napkin rings to place where male dinner guests would be sitting. This one is English and English napkin rings usually don't have the more ornate designs that I gravitate to. These are just a few that I took photos of but I always have enjoyed adding to this collection. It's the "hunt" to find that perfect one that intrigues me at the many antique shows I attend.


 This salt cellar is one of two that I placed at each end of the table. Antiques also, sterling with original cobalt blue inserts, French and came from a New Orleans plantation.
The placemats are a hot pink woven mat, wine glasses are Varga with each a different color and have butterflies and bees etched on them. Perfect for a Spring table.
I am sharing this post for Tablescape Thursday at Between Naps on the Porch. To see other beautiful table settings just click HERE.


Tuesday, June 2, 2015

A Refreshing Sangria

Not too long ago I took a cooking class at a local kitchen shop. The guest instructor is a blogging friend who lives in my area and I have taken several of her classes which I have enjoyed tremendously. Not only is she so very witty and shares some great recipes but the conversations that come up in her classes I have learned so many things as well. She always serves us some kind of fabulous liquid refreshment and I wanted to share one here that I have enjoyed over and over again.

This Sangria is so light, refreshing and with a lighter wine the fruit comes through more clearly. I have been making this ever since this recipe was shared. I find it absolutely delicious.

I used a sauvignon blanc as was suggested and found this to be perfect. If you steep it in the refrigerator for several hours you really do taste the fruit so much more than with a heavier wine.

You ask yourself, "What makes this Sangria so different?" Good question and the answer..............an orange infused simple syrup.

The recipe is not really a recipe but I used a 1.5 L of sauvignon blanc, orange infused simple syrup to taste (1/2 C water to 1/2 C sugar and the rind of one navel orange) simmered just until the sugar melts, and fruit (sliced lemon, sliced strawberries, and sliced orange). You could add any other fruit you happen to have on hand but this is what I used. You taste the sweetness of the strawberries and orange and the lemon gives it a needed crispness. Mix all the ingredients together in a large pitcher and chill before serving. This will keep in the refrigerator for several days with the fruit infusing even more.

As you add the ingredients of the Sangria together taste it because some may want more sweetness than others. I happened to add in the whole amount of simple syrup that I made and found it to be perfect for my tastes.

 
I think it's important also to the taste to place it in an elegant glass, yes you did read that right. I served mine in a Waterford wine glass, made it even more delicious with a touch of elegance. Don't forget that orange infused simple syrup, it makes all the difference in the world. Opened me up to a new way of making Sangria and BTW, just to kick it up a notch I added a splash or two or three of Grand Marnier to the pitcher. Everything tastes better with Grand Marnier IMO.
 
The simple syrup will keep for several days in the refrigerator as well if you decide not to use all of it. Just place it in a jar with a tight fitting lid. This syrup tastes super in iced tea too with a slice of orange.
 
Give this a try for a refreshing summer cocktail. You won't be disappointed.


Have a good evening, Carolyn

I am linking this post to Foodie Friday.