

Saturday, May 11, 2013
Friday, May 3, 2013
A Long Awaited For Plant
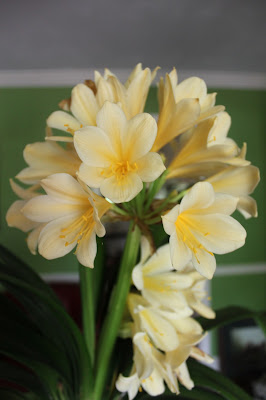
Several years ago I happened to see a photo of a blooming yellow clivia so I researched it. Found a nursery in the northeast that sold this plant for $100.00 and I am sure it was a very small plant that probably wouldn't bloom for a couple of years. I have to say I was tempted to bite the dust more than once and order it. I had learned that they were indeed very rare which accounts for the high price. These are more commonly seen in an orange color.
Well a couple of years ago I was visiting a nursery just south of where I live and I walked passed this blooming yellow clivia. I asked the clerk how much it was and she told me $35.00 and it was a large plant too. Wellllllllll, I don't have to tell you, I immediately said very loudly, "SOLD". I was in a state of shock and wanted to make sure I had heard her right and after she sold it to me I told her the story of trying to find this plant and how much another nursery was selling it for. I have to say, these kinds of things never happen to me. Usually I would charge forward and buy the more expensive plant and then come upon the same plant later for a less expensive price. That's just my luck, sadly.
This is now the second time it has bloomed and I wanted to share it with you.

Well a couple of years ago I was visiting a nursery just south of where I live and I walked passed this blooming yellow clivia. I asked the clerk how much it was and she told me $35.00 and it was a large plant too. Wellllllllll, I don't have to tell you, I immediately said very loudly, "SOLD". I was in a state of shock and wanted to make sure I had heard her right and after she sold it to me I told her the story of trying to find this plant and how much another nursery was selling it for. I have to say, these kinds of things never happen to me. Usually I would charge forward and buy the more expensive plant and then come upon the same plant later for a less expensive price. That's just my luck, sadly.
This is now the second time it has bloomed and I wanted to share it with you.

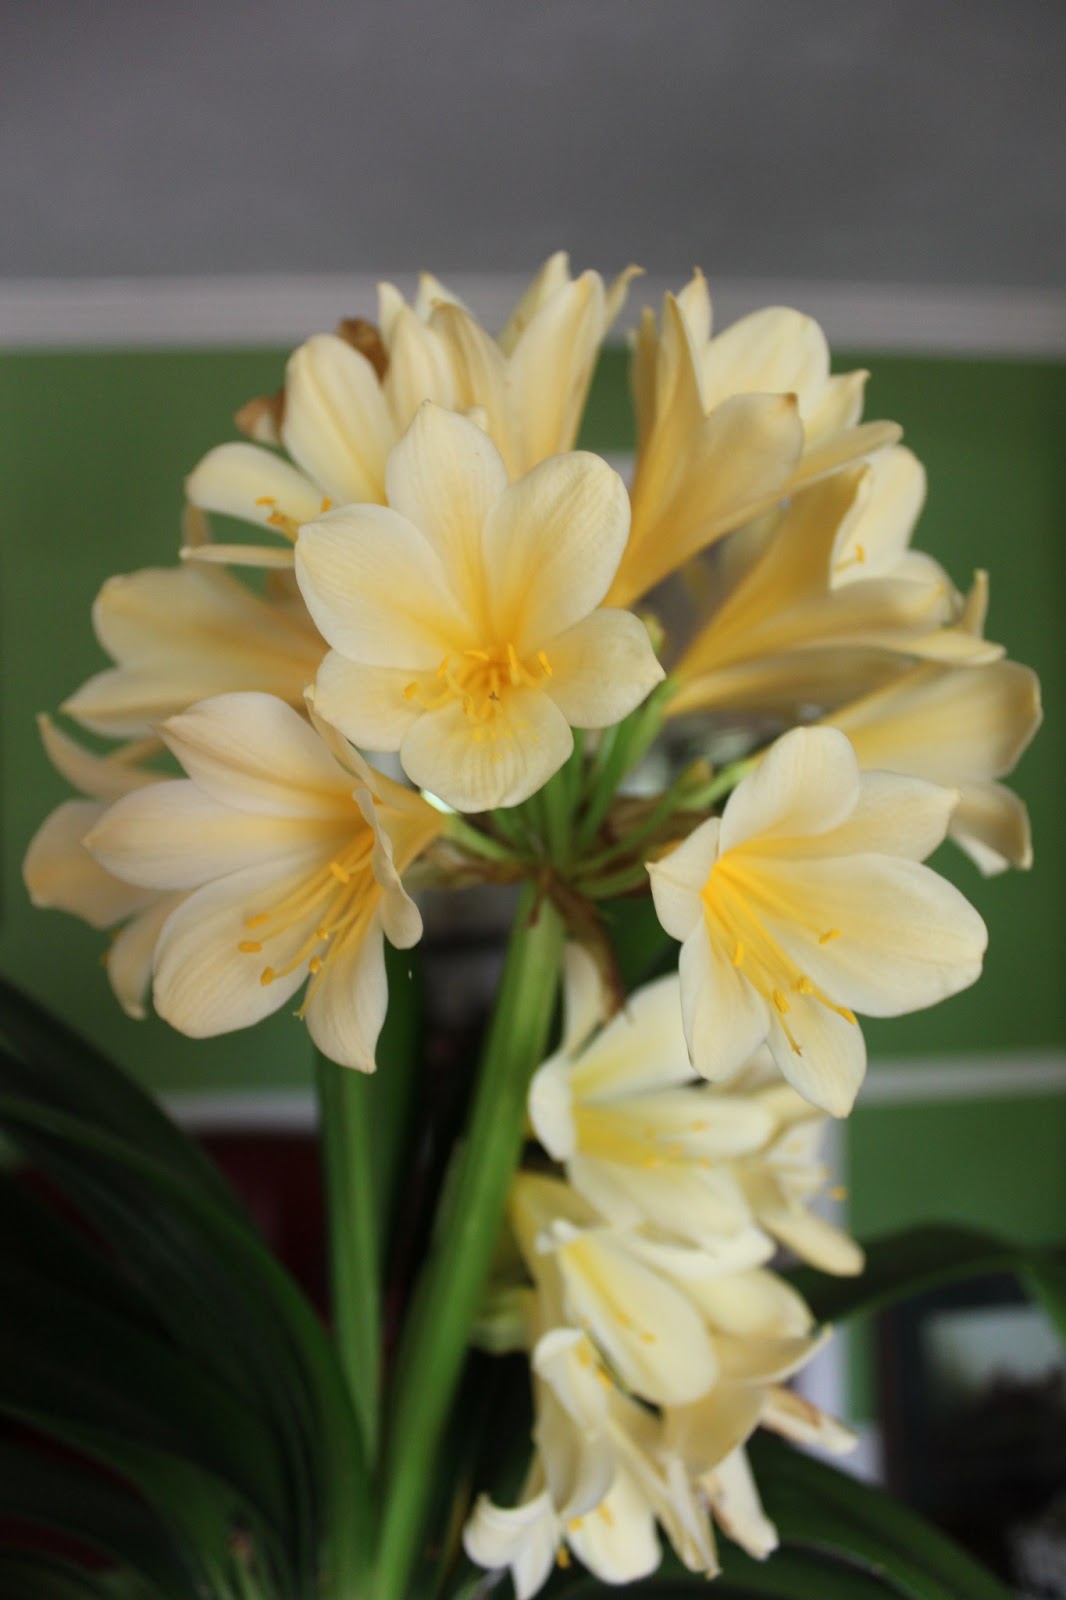
The good news is that each time it blooms it puts up these seeds at the base of the bloom like an amaryllis would. The first time I really didn't know what to do with them and gave them to some friends in my garden circle. The last time it bloomed I let them dry out and found that there were two separate seeds in each one. This is now the third time it has bloomed since I have had it, isn't it gorgeous? I usually keep it outside unless it is cold or is blooming and this time I brought it in and placed it on my husband's desk in his office in this Italian pot. The seeds from the last bloom period I plan to plant them in peat pots and see what kind of luck I have. I think they would make an excellent hostess gift when going to a dinner party. Even if it is not blooming I can attach a photo of the bloom. BTW, it requires very little care.
If you ever come across one and want some information on them I found this:
There is a morale to this story, I should not be so quick to purchase things that I might could find at a lesser expensive price. One day I will learn.
Enjoy your weekend.
Thursday, April 18, 2013
YaYa Dinner Party
A few weeks ago my dinner group met and I realized that I had failed to share the table setting and it was such a lovely table. My dinner group is only women, we get together once a month and we call ourselves the YaYa's. We are all so very Southern, of course, and have all been friends for many years. We look forward each month to this dinner gathering with excellent culinary delights and fellowship.


Our delightful menu was a Seafood Lasagna, Roasted Asparagus with a refreshing congealed Cranberry Salad on a bed of fresh baby greens. It was absolutely delicious. I should find out about the individual molds because that was such a nice touch.
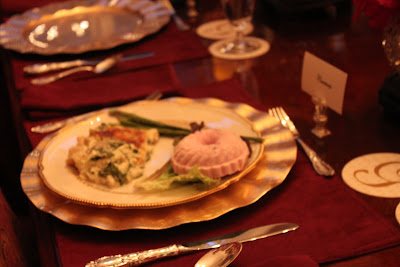
A wonderful evening was had by all in this beautiful home, a charming hostess, an amazing and delicious dinner and lots of laughs and fun.

I am sharing my post at Susan's blog party, Tablescape Thursday.

My friend has a beautiful home and when we met she had some azalea's blooming in her garden which she used as her centerpieces, low enough to talk over.

She had set such a beautiful table.


Her china pattern is one that I have admired for a very long time and have often thought that I would like to add this pattern to my own collection of china. The pattern is Laurel by Castleton, an American china pattern and the company began producing china in 1901. The pattern originally belonged to my friends mother and she has added pieces over the years. It is such a beautiful pattern. The sterling flatware is the King Richard pattern. My friend chose this pattern when she married because her husband's name was Richard. I just love hearing story's that have special meaning to someone as to why and how one comes to chose these things. Unfortunately I do not know the patterns of the goblets.

I didn't get a close up while at our dinner party but found a pic online. I love the laurel leaves in gold on the inner band and the outer band of gold is beaded.

Our delightful menu was a Seafood Lasagna, Roasted Asparagus with a refreshing congealed Cranberry Salad on a bed of fresh baby greens. It was absolutely delicious. I should find out about the individual molds because that was such a nice touch.

A wonderful evening was had by all in this beautiful home, a charming hostess, an amazing and delicious dinner and lots of laughs and fun.

I am sharing my post at Susan's blog party, Tablescape Thursday.
Saturday, April 13, 2013
Penne with Braised Short Ribs
This recipe is one that I had watched Giada prepare on a repeat program of hers. I had never seen this particular program but as she prepared it I thought it sounded amazing. I'm not sure if it appears in any of her books but it may. I made my copy from my computer.

Penne with Braised Short Ribs
serves 4 to 6
4 pounds beef short ribs
Kosher salt and freshly ground black pepper
1/4 cup olive oil
1 large onion, diced
3 cloves garlic, coarsely chopped
5 Roma tomatoes, cut into eighths
1 cup red wine, such as Cabernet Sauvignon
3 tablespoons Dijon mustard
2 cups low-sodium beef broth
1 pound penne pasta
1/4 cup freshly grated Parmesan
1/4 cup chopped fresh flat-leaf parsley
Place an oven rack in the lower 1/3 of the oven. Preheat the oven to 350 degrees F.
Season the ribs with salt and pepper. In a large heavy-bottomed Dutch oven or ovenproof stock pot, heat the oil over medium-high heat. In batches, add the ribs and brown on all sides, about 8 to 10 minutes. Remove the ribs and set aside. Add the onion and garlic and cook, stirring frequently, for 2 minutes. Add the tomatoes, wine and mustard. Bring the mixture to a boil and scrape up the brown bits that cling to the bottom of the pan with a wooden spoon. Return the ribs to the pan. Add the beef broth, cover the pan and place in the oven for 2 1/2 hours until the meat is fork-tender and falls easily from the bone
Remove the ribs from the cooking liquid. Using a large spoon, remove any excess fat from the surface of the cooking liquid. Using a ladle, transfer the cooking liquid in the bowl of a food processor. Process until the mixture is smooth. Pour the sauce into a saucepan and keep warm over low heat. Remove the meat from the bones. Discard the bones. Using 2 forks, shred the meat into small pieces. Stir the shredded meat into the sauce. Season with salt and pepper, to taste.
Bring a large pot of salted water to a boil over high heat. Add the pasta and cook until tender but still firm to the bite, stirring occasionally, about 8 to 10 minutes. Drain the pasta and place in a large serving bowl. Using a slotted spoon, remove the meat from the sauce and add to the pasta. Pour 1 cup of the sauce over the pasta. Toss well and thin out the pasta with more sauce, if needed. Sprinkle the pasta with Parmesan cheese and chopped parsley before serving.

I chose to use a French Pinot Noir in this dish, something I would drink with the dish.


Penne with Braised Short Ribs
serves 4 to 6
4 pounds beef short ribs
Kosher salt and freshly ground black pepper
1/4 cup olive oil
1 large onion, diced
3 cloves garlic, coarsely chopped
5 Roma tomatoes, cut into eighths
1 cup red wine, such as Cabernet Sauvignon
3 tablespoons Dijon mustard
2 cups low-sodium beef broth
1 pound penne pasta
1/4 cup freshly grated Parmesan
1/4 cup chopped fresh flat-leaf parsley
Place an oven rack in the lower 1/3 of the oven. Preheat the oven to 350 degrees F.
Season the ribs with salt and pepper. In a large heavy-bottomed Dutch oven or ovenproof stock pot, heat the oil over medium-high heat. In batches, add the ribs and brown on all sides, about 8 to 10 minutes. Remove the ribs and set aside. Add the onion and garlic and cook, stirring frequently, for 2 minutes. Add the tomatoes, wine and mustard. Bring the mixture to a boil and scrape up the brown bits that cling to the bottom of the pan with a wooden spoon. Return the ribs to the pan. Add the beef broth, cover the pan and place in the oven for 2 1/2 hours until the meat is fork-tender and falls easily from the bone
Remove the ribs from the cooking liquid. Using a large spoon, remove any excess fat from the surface of the cooking liquid. Using a ladle, transfer the cooking liquid in the bowl of a food processor. Process until the mixture is smooth. Pour the sauce into a saucepan and keep warm over low heat. Remove the meat from the bones. Discard the bones. Using 2 forks, shred the meat into small pieces. Stir the shredded meat into the sauce. Season with salt and pepper, to taste.
Bring a large pot of salted water to a boil over high heat. Add the pasta and cook until tender but still firm to the bite, stirring occasionally, about 8 to 10 minutes. Drain the pasta and place in a large serving bowl. Using a slotted spoon, remove the meat from the sauce and add to the pasta. Pour 1 cup of the sauce over the pasta. Toss well and thin out the pasta with more sauce, if needed. Sprinkle the pasta with Parmesan cheese and chopped parsley before serving.

I chose to use a French Pinot Noir in this dish, something I would drink with the dish.
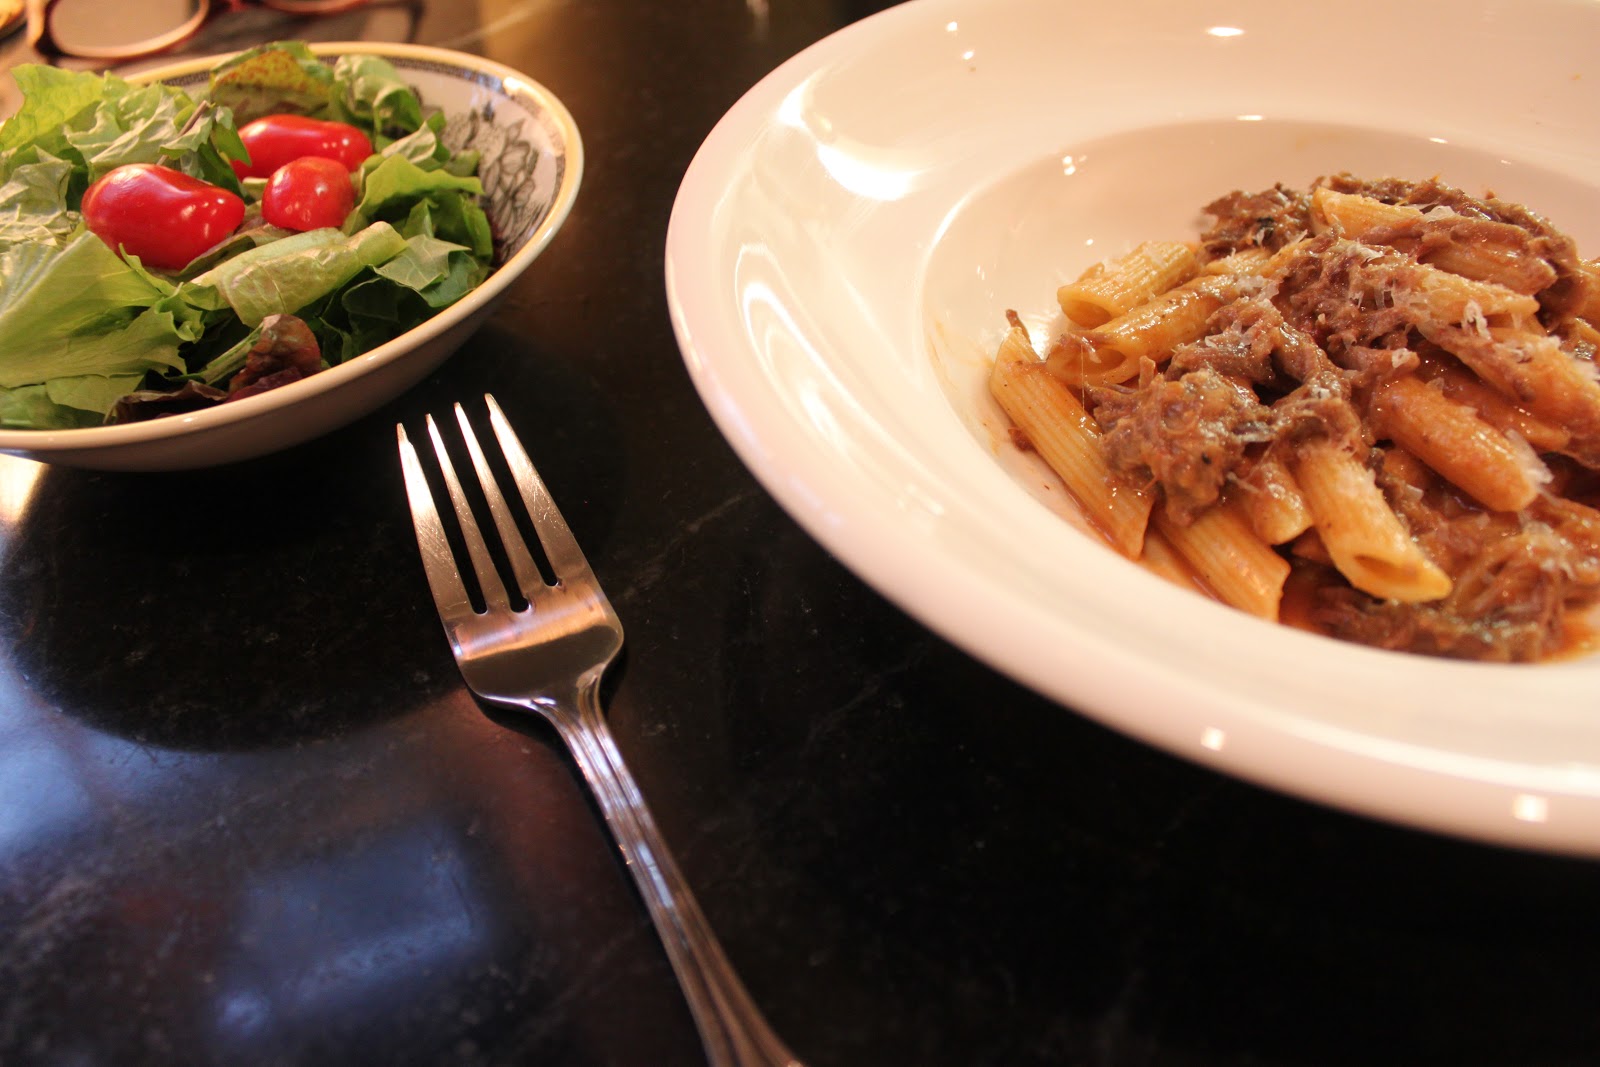
My husband is a very picky eater but he raved over this and it is such an economical dinner as well.

Pared with a simple salad it was quite simply, an excellent dinner.

Whenever I find a recipe that pleases my husband and he raves about it, I will definitely be preparing this again and again.
I hope you are enjoying your weekend.
Wednesday, April 3, 2013
Easter Decorations and Dinner Table
Easter has come and gone but I wanted to share some of my Easter decorations and my table setting for Easter dinner. Most of our family shared the day with us with the exception of my oldest son and his family. Their twin boys came down with some kind of bug that is going around so they didn't want the rest of us to get it plus the two boys were in the bed.
Because we were minus four people I chose not to do an children's table as I usually do. Instead all the children sat with the grown up and they loved it.


Different flowers in each container but all in the same color scheme.


Because we were minus four people I chose not to do an children's table as I usually do. Instead all the children sat with the grown up and they loved it.

Instead of making one large flower arrangement I chose to do three smaller arrangements with my crystal candle holders but also with small voitive's scattered around as well.

Different flowers in each container but all in the same color scheme.


The pink and white flowers are tulips and they opened up huge, they were gorgeous.

Trying to keep everything simple I used my Vilroy & Boch white dishes sitting on green fluted chargers, hotel silver flatware, the water glasses I don't even know what they are or where I got them I have had them so very long but the wine glasses are Waterford. The tablecloth and napkins came from William Sonoma and the table runner is a new purchase. It is burlap, lined and you can't see it here but our last initial is monogrammed on each end. The chandelier we purchased about four years ago too and it is made by Swarovski. The pattern is called New Orleans and I do love some French influences in my home.

These little running rabbit napkin rings was a purchase from Pottery Barn a couple of years ago.

My sideboard was decorated with some of my favorite bunnies nestled around my Easter Tree. I have collected these ornaments over the years and some hold some very fond memories of special gifts from special people. My sideboard is a 1920's mahogany piece and when I got my new and larger dining room table and china cabinet about four years ago I decided I could not part with this sideboard. I am not one to do the matchy matchy thing anyway and think it is far more interesting to mix pieces. The lamps on the sideboard are Waterford.


There are several of these little birds on my tree and I was gifted with these many years ago by a dear friend. I think of her everyday but most especially when I place these little birds on my Easter Tree. We both share a fondness for gardening and our feathered friends as well as many other shared interests.


Of course, GiGi (that's what my grands call me) had to have Easter baskets for the children filled with goodies but also a few little gifts.

One of my grand daughters got this darling flamingo with bunny ears. I found that I could not resist it, I ask you how cute is this?

Two of the girls got stuffed bunnies but with their own monogram on the ears.


The older grand daughter being six almost seven has sadly outgrown stuffed bunnies sooooooo she got a new Barbie and a hair dresser chair for her American Girl. I was given lots and lots of hints.

We even had bunnies on the mantle as part of our Easter decor with candle eggs in the candle holders.

We had a most enjoyable Easter. After dinner we spent the rest of the afternoon having multiple Easter Egg Hunts.
Easter Menu
Ina Garten's Baked Virginia Ham
Collard Greens
Red Potato Salad
Roasted Asparagus with a Fig Balsamic Vinaigrette
Green Beans with Fingerling Potatoes
Deviled Eggs
and for Dessert
a medley of Cupcakes

Our traditional family dessert is a Cointreau Cake that I have been making for years and I garnish it with pansy's from my garden but this year time got away from me so I was compelled to go to plan "B". I made a trip to the Cupcakery, a darling little shop that makes the MOST delicious cupcakes. Besides that the children liked that even better.

One of my family's favorite appetizers is my Sun Dried Tomato Hummus. Even the children love it and it is somewhat different for most Humus's.
Sun-Dried
Tomato Hummus
1 15-ounce can garbanzo beans (drained and rinsed)
1 15-ounce can garbanzo beans (drained and rinsed)
3 ounces cream cheese, softened
1 ounce sun-dried tomatoes, minced
1/4 cup sliced green onion (white and pale green parts only), sliced thin
2 teaspoons prepared horseradish
1 tablespoon fresh lemon juice
1/2 teaspoon olive oil
1/2 teaspoon salt
1/2 teaspoon fresh ground pepper
Directions:
Combine all ingredients in a food processor or blender and puree until smooth. Check taste and add additional salt, pepper and horseradish, to taste. You may want to add more sun-dried tomatoes as well.
1 ounce sun-dried tomatoes, minced
1/4 cup sliced green onion (white and pale green parts only), sliced thin
2 teaspoons prepared horseradish
1 tablespoon fresh lemon juice
1/2 teaspoon olive oil
1/2 teaspoon salt
1/2 teaspoon fresh ground pepper
Directions:
Combine all ingredients in a food processor or blender and puree until smooth. Check taste and add additional salt, pepper and horseradish, to taste. You may want to add more sun-dried tomatoes as well.
My notes: I usually add a little more sun-dried tomatoes and I always use those that are jarred and in olive oil. If the hummus is too pasty then I add in some of the oil from the sun-dried tomatoes. I really like not using tahani but using the horseradish instead. It makes a most unusual hummus and it is delicious. My grands could eat their weight in this hummus. Anything the children will like I definitely will make and they don't know it so good for them,YAH!!!!
I am linking my post to Between Naps on the Porch and Design by Gollum.

I hope each of you had a fun filled family holiday as we did. Thank you for visiting my blog and please do come again.
Friday, March 22, 2013
Jarlsberg Vegetable Bisque
I am collector of cookbooks and have been collecting for many years. I often read them like novels and put them aside but I have been thinking that I really need to cut back on my cookbook purchases unless it is a "MUST HAVE" and really start using some of the wonderful books that I have collected over the years. I began thumbing through some of those that I had thought to be excellent. I found this book, Come On In, recipes from the Junior League of Jackson, Mississippi to be a book that I can cook from. This book happens to be an excellent book and I believe that the Junior League of Jackson has published three very good books and I have two of them.

I remembered when I first got this book several years ago that I had bookmarked this recipe, Jarlsberg Vegetable Bisque. After looking through this book recently I decided to prepare some of those recipes that I had originally bookmarked. This was the first and I have to say it is quiet simply DELICIOUS!!!!
Jarlsberg Vegetable Bisque
Serves 6-8
3 Tbs unsalted butter
3 Tbs all-purpose flour
4 cups chicken stock
1 lb fresh broccoli, coarsely chopped
2 carrots, chopped
1 stalk celery, chopped
1 small onion, chopped
1 clove garlic, minced
1/4 tsp dried thyme
1/2 tsp salt
1/8 tsp pepper
1/2 pint heavy cream
1 large egg yolk
8 oz Jarlsberg Swiss cheese, shredded
In a large, heavy saucepan, melt butter, add flour, and cook several minutes, stirring constantly. Remove from heat and gradually blend in stock, then bring mixture to a boil while stirring. Add broccoli, carrots, celery, onion, garlic, thyme, salt, and pepper. Cover and simmer until vegetables are tender, 8 minutes. Blend cream and egg. Gradually blend several tablespoons of soup into egg mixture, then add egg mixture to soup and cook, stirring until thickened. Blend in cheese. Can be served hot or cold.

It was an easy soup to make and I used a 6-quart dutch oven. A comfort food soup on a chilly night. Actually I would eat this soup any time of year.

This is a soup that you would want to use the best ingredients you have available. If you love the ingredients you will love this soup.

It is basically a Broccoli Cheese Soup turned up a notch. I did have to add a little more salt and pepper to taste and I shared it with my daughter and son in law. My daughter loved it so much that she didn't even share with her husband, oops. She thought it was amazing.
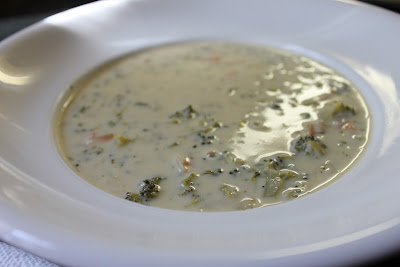
It is not a soup that I will make often because of the cream but it was only 1/2 pint so on occasion how bad can that be I ask you? I have also identified numerous recipes from this book that I thought would be delicious and will be preparing them soon. All in an effort to justify my out of control collection. Does anyone out there share in that obsession? This book has been a pleasant surprise and I am now wondering, "Why haven't I really utilized this book before?" It's a keeper for sure.
I am sharing this recipe for Foodie Friday hosted by Michael Lee at Rattlebridge Farm. You can see other wonderful recipes shared by clicking HERE.
I remembered when I first got this book several years ago that I had bookmarked this recipe, Jarlsberg Vegetable Bisque. After looking through this book recently I decided to prepare some of those recipes that I had originally bookmarked. This was the first and I have to say it is quiet simply DELICIOUS!!!!
Jarlsberg Vegetable Bisque
Serves 6-8
3 Tbs unsalted butter
3 Tbs all-purpose flour
4 cups chicken stock
1 lb fresh broccoli, coarsely chopped
2 carrots, chopped
1 stalk celery, chopped
1 small onion, chopped
1 clove garlic, minced
1/4 tsp dried thyme
1/2 tsp salt
1/8 tsp pepper
1/2 pint heavy cream
1 large egg yolk
8 oz Jarlsberg Swiss cheese, shredded
In a large, heavy saucepan, melt butter, add flour, and cook several minutes, stirring constantly. Remove from heat and gradually blend in stock, then bring mixture to a boil while stirring. Add broccoli, carrots, celery, onion, garlic, thyme, salt, and pepper. Cover and simmer until vegetables are tender, 8 minutes. Blend cream and egg. Gradually blend several tablespoons of soup into egg mixture, then add egg mixture to soup and cook, stirring until thickened. Blend in cheese. Can be served hot or cold.

It was an easy soup to make and I used a 6-quart dutch oven. A comfort food soup on a chilly night. Actually I would eat this soup any time of year.

This is a soup that you would want to use the best ingredients you have available. If you love the ingredients you will love this soup.

It is basically a Broccoli Cheese Soup turned up a notch. I did have to add a little more salt and pepper to taste and I shared it with my daughter and son in law. My daughter loved it so much that she didn't even share with her husband, oops. She thought it was amazing.

It is not a soup that I will make often because of the cream but it was only 1/2 pint so on occasion how bad can that be I ask you? I have also identified numerous recipes from this book that I thought would be delicious and will be preparing them soon. All in an effort to justify my out of control collection. Does anyone out there share in that obsession? This book has been a pleasant surprise and I am now wondering, "Why haven't I really utilized this book before?" It's a keeper for sure.
I am sharing this recipe for Foodie Friday hosted by Michael Lee at Rattlebridge Farm. You can see other wonderful recipes shared by clicking HERE.
Thursday, March 7, 2013
Buttermilk Blueberry Breakfast Cake
Recently I was going through some of the mountains of copies of recipes that I have collected from other blogger's over the years. One day I plan to organize them but this particular day I was looking for a recipe using blueberries. I came upon this recipe that I got from a fellow blogger, Martha at Lines from Linderhof. If you have visited Martha's blog you know that she shares excellent recipes, teaches cooking classes in her hometown and often posts recipes that she enjoys while having tea. She often calls them a "nosh", I now love that word.
I was also looking for a recipe that was quick, easy, using blueberries but also a great "nosh" for afternoon tea.

Buttermilk Blueberry Breakfast Cake
Serves 6-8
½ cup unsalted butter, room temperature
2 teaspoons lemon zest or more, zest from 1 large lemon
7/8 cup* + 1 tablespoon sugar**
1 egg, room temperature
1 teaspoon vanilla
2 cups flour
2 teaspoons baking powder
1 teaspoon kosher salt
2 cups fresh blueberries
½ cup buttermilk
* 7/8 cup = 3/4 cup + 2 tablespoons
** This 1 tablespoon is for sprinkling on top
1. Preheat the oven to 350ºF. Cream butter with lemon zest and 7/8 cup of the sugar until light and fluffy.
2. Add the egg and vanilla and beat until combined. Meanwhile, toss the blueberries with ¼ cup of flour, then whisk together the remaining flour, baking powder and salt.
3. Add the flour mixture to the batter a little at a time, alternating with the buttermilk. Fold in the blueberries.
4. Grease a 9-inch square baking pan (or something similar) with butter or coat with non-stick spray. Spread batter into pan. Sprinkle batter with remaining tablespoon of sugar. Bake for 35 minutes. Check with a toothpick for doneness. If necessary, return pan to oven for a couple of more minutes. (Note: Baking for as long as 10 minutes more might be necessary.) Let cool at least 15 minutes before serving.
~ I didn't use all of the blueberries called for, maybe 2/3rds or so. I think some blueberry cakes tend to get too mushy with too much fruit so I scaled back a bit, it was the perfect amount, for us anyway.
---------------------------------------------------------------------------------------
I had all of the ingredients on hand and it was a snap to prep. Who doesn't love a cake using buttermilk but better yet using blueberries? This little cake is made even better with the addition of lemon zest, the more flavorful part of a lemon. I love that little bit of freshness added to the batter.

It is a thick batter but comes out a very moist little cake.


It keeps for several days and I enjoyed every morsel. Perfect as a breakfast cake but also perfect for an afternoon tea "nosh".
I am linking this post to Foodie Friday hosted by Michael Lee West at Rattlebridge Farm. To see other wonderful recipes shared click HERE, you won't be disappointed. Also take a look at some of the recipes that Martha shares at Lines from Linderhof and you can click HERE. I think Martha has posted this recipe on her blog but it's a great little cake and worthy of sharing again.
I was also looking for a recipe that was quick, easy, using blueberries but also a great "nosh" for afternoon tea.

Buttermilk Blueberry Breakfast Cake
Serves 6-8
½ cup unsalted butter, room temperature
2 teaspoons lemon zest or more, zest from 1 large lemon
7/8 cup* + 1 tablespoon sugar**
1 egg, room temperature
1 teaspoon vanilla
2 cups flour
2 teaspoons baking powder
1 teaspoon kosher salt
2 cups fresh blueberries
½ cup buttermilk
* 7/8 cup = 3/4 cup + 2 tablespoons
** This 1 tablespoon is for sprinkling on top
1. Preheat the oven to 350ºF. Cream butter with lemon zest and 7/8 cup of the sugar until light and fluffy.
2. Add the egg and vanilla and beat until combined. Meanwhile, toss the blueberries with ¼ cup of flour, then whisk together the remaining flour, baking powder and salt.
3. Add the flour mixture to the batter a little at a time, alternating with the buttermilk. Fold in the blueberries.
4. Grease a 9-inch square baking pan (or something similar) with butter or coat with non-stick spray. Spread batter into pan. Sprinkle batter with remaining tablespoon of sugar. Bake for 35 minutes. Check with a toothpick for doneness. If necessary, return pan to oven for a couple of more minutes. (Note: Baking for as long as 10 minutes more might be necessary.) Let cool at least 15 minutes before serving.
~ I didn't use all of the blueberries called for, maybe 2/3rds or so. I think some blueberry cakes tend to get too mushy with too much fruit so I scaled back a bit, it was the perfect amount, for us anyway.
---------------------------------------------------------------------------------------
I had all of the ingredients on hand and it was a snap to prep. Who doesn't love a cake using buttermilk but better yet using blueberries? This little cake is made even better with the addition of lemon zest, the more flavorful part of a lemon. I love that little bit of freshness added to the batter.

It is a thick batter but comes out a very moist little cake.

I wanted to let the cake brown a little longer but resisted and took it out and checked it with a cake tester. I am glad I did because it was perfectly done. I think I could have cooked it for less time, variation in ovens surely.

It keeps for several days and I enjoyed every morsel. Perfect as a breakfast cake but also perfect for an afternoon tea "nosh".
I am linking this post to Foodie Friday hosted by Michael Lee West at Rattlebridge Farm. To see other wonderful recipes shared click HERE, you won't be disappointed. Also take a look at some of the recipes that Martha shares at Lines from Linderhof and you can click HERE. I think Martha has posted this recipe on her blog but it's a great little cake and worthy of sharing again.
Thursday, February 21, 2013
Simply Delicious Strawberry Cake
I rarely use a cake mix but every now and then you come across a recipe that screams, "It's okay to use a cake mix!" This recipe has so many ingredients that I don't think it really matters if it's from scratch or not, it is truly Simply Delicious.
A recipe from Paula Deen and it is just a wonderful cake. We started getting strawberries from South Florida a few weeks ago and I think the best strawberries are always the earliest strawberries. When we began to get the fresh strawberries in so early it was a gentle reminder of this cake. I also thought it was a good time to make this cake when I had the whole family at home for dinner otherwise I would be eating the whole cake and that's not a good thing. I think this is all of my grand daughters' favorite cake, anything pink or strawberry.


I didn't find it necessary to add any food coloring, the cakes were definitely pink.

I loved the fragrance of those pureed' strawberries and the garnish of the fresh strawberries only made this cake better.

When I make this cake again I will probably place the strawberries on the outer edge for a prettier presentation.

If you try this cake you won't be disappointed and it would make a spectacular dessert for Easter or even for a Summer function. No one would ever guess that it was made with a box cake mix and what doesn't taste outstanding with a cream cheese frosting?
I am sharing this post for Foodie Friday hosted by Michael Lee at Rattlebridge Farm. Click Here to see other outstanding shared recipes.
A recipe from Paula Deen and it is just a wonderful cake. We started getting strawberries from South Florida a few weeks ago and I think the best strawberries are always the earliest strawberries. When we began to get the fresh strawberries in so early it was a gentle reminder of this cake. I also thought it was a good time to make this cake when I had the whole family at home for dinner otherwise I would be eating the whole cake and that's not a good thing. I think this is all of my grand daughters' favorite cake, anything pink or strawberry.

Simply Delicious Strawberry Cake
Makes 1-9-inch cake
1 (18.25-ounce) box white cake mix
1 (3-ounce) box strawberry-flavored gelatin
1 (10-ounce) package frozen strawberries in syrup, thawed and pureed
4 large eggs
1/2 cup vegetable oil
1/4 cup water
Strawberry Cream Cheese Frosting (recipe follows)
Garnish: fresh sliced strawberries
Preheat oven to 350*. Lightly grease 2 (9-inch) round cake pans.
In a large bowl, combine cake mix and gelatin. Add pureed strawberries, eggs, oil, and 1/4 cup water; beat at medium speed with a mixer until smooth. Pour into prepared pans.
Bake for 20 minutes or until a wooden pick inserted in center comes out clean. Let cool in pans for 10 minutes. Remove from pans, and cool completely on wire racks. Spread Strawberry Cream Cheese Frosting between layers and on top and sides of cake. Garnish with fresh sliced strawberries, if desired. Store cake, covered, in the refrigerator up to 3 days.
Strawberry Cream Cheese Frosting
Makes about 4 cups
1 (8-ounce) package cream cheese, softened
1/4 cup butter, softened
1 (10-ounce) package frozen strawberries in syrup, thawed, pureed, and divided
1/2 teaspoon strawberry extract
7 cups confectioners' sugar
In a large bowl, beat cream cheese and butter at medium speed with a mixer until creamy.
Beat in 1/4 cup strawberry puree' ; reserve remaining puree' for another use. Beat in extract. Gradually add confectioners' sugar, beating until smooth.
Note: For pinker frosting, add 2 to 3 drops of red food coloring to frosting.

I didn't find it necessary to add any food coloring, the cakes were definitely pink.

I loved the fragrance of those pureed' strawberries and the garnish of the fresh strawberries only made this cake better.

When I make this cake again I will probably place the strawberries on the outer edge for a prettier presentation.

If you try this cake you won't be disappointed and it would make a spectacular dessert for Easter or even for a Summer function. No one would ever guess that it was made with a box cake mix and what doesn't taste outstanding with a cream cheese frosting?
I am sharing this post for Foodie Friday hosted by Michael Lee at Rattlebridge Farm. Click Here to see other outstanding shared recipes.
Subscribe to:
Posts (Atom)