Tuesday, October 25, 2011

Sunday, October 23, 2011

Herbed Quiche With Blue Cheese

Chari at Happy to Design hosts Sunday Favorites. It is a repost of one of your favorite posts and a fun blogging party. This will be linked to Chari's blog for Sunday Favorites.
-----------------------------------------------

So many evenings my husband and I prefer a lighter dinner and we both happen to enjoy a good quiche. This particular quiche we both thought to be exceptional. It has this luchious creamy texture, more so than in most quiches.


The recipe comes from a book I am really enjoying, Farm to Fork by Emeril Lagassee. This is Emeril's newest book and like most recent cookbook authors he encourages everyone to cook with local fresh ingredients.

Herbed Quiche With Blue Cheese


1 pie crust
6 ounces cream cheese, at room temperature
2 ounces Maytag blue cheese, at room temperature
2 tablespoons unsalted butter, at room temperature
3 eggs
1 cup heavy cream
1 cup whole milk
1/2 teaspoon salt
1/4 teaspoon freshly ground black pepper
3 tablespoons chopped fresh mixed herbs, such as parsley, thyme, tarragon, chives, and/or oregano

1. Preheat the oven to 400*F.

2. Place the pie crust in an 8-inch fluted tart pan.

3. Line the pastry shell with parchment paper, and fill it with ceramic pie weights or dried beans. Place the tart pan on a baking sheet, and bake for 9 minutes. Remove the baking sheet from the oven and set the tart pan on a wire rack to cool. Remove the parchment paper and the weights.

4. Reduce the oven temperature to 375*F.

5. In a medium bowl, whisk together the cream cheese, blue cheese, and butter. Whisk in the eggs until well blended. Stir in the cream, milk, salt, pepper, and herbs. Pour the filling into the partially baked pie shell. Return the tart pan to the baking sheet and bake, rotating the quiche halfway through, until it is puffed and golden brown, 25 minutes. The quiche is done when a knife inserted in the center comes out clean.

6. Remove the tart pan from the baking sheet and set it on a wire rack to cool for at least 5 minutes before slicing. Serve hot, warm, or at room temperature

6 to 8 servings

Using fresh herbs is a MUST for this quiche and I do grow many herbs in my garden. However, if you don't grow your own herbs most grocery stores are carrying fresh herbs. I used Italian parsley, thyme and garlic chives. The recipe says you can use oregano and even though I do have it in my herb garden I find that I rarely use it. It is a very strong herb used fresh. I think the use of tarragon would be delicious but mine was knocked back by the cold weather and is just now beginning to come back up. The next time I prepare this I will definitely use the tarragon. I also used a gorgonzola cheese which is what I had on hand and I think most any blue cheese works well in this recipe. The Maytag blue would probably be a more stronger tasting cheese and I will probably use it the next time.

Not exactly the best photo but it surely was so very delicious. I simply pared this quiche with sliced heirloom tomatoes with a drizzle of basil infused olive oil and sprinkled with one of my favorite sea salts, a French Herbed Sea Salt. I use this Herbed Sea Salt all the time, in pasta water, on veggies before serving, it is a favorite of mine and I am never without it.

A nice crisp bottle of Pinot Gris went nicely with it as well and made for a fabulous dinner. My husband said it was the BEST I had ever made and that says a lot to me since he is a very picky eater. Another very poor pic but you can definitely see the creaminess of this quiche.

I hope you will try this quiche, it would be excellent for a ladies luncheon or a lighter evening dinner. You won't be disappointed.

Thursday, October 20, 2011

St. Teresa Crab Casserole

Many years ago I worked on our Junior League cookbook and I was in charge of the Seafood Section. We are so very fortunate to have an abundance of delicious seafood available year round from the Gulf of Mexico and the good news is that our area was not affected by the most recent oil spill. Our state continually tests our seafood for that reason.

I thoroughly enjoyed working on our league cookbook and it was a three year adventure testing and retesting to put out what we considered to be a very professional publication. I also think it has with stood the test of time as well and gives those buying this book a real feel for our community and our Southern traditions.
One of my most favorite recipes in this book is St. Teresa Crab Casserole. St. Teresa is a small private community along the Gulf Coast where many families from our town have beach homes. St. Teresa also has some family significance in that one of it's original founders was the great grandfather of my daughter in law. We very often spend many wonderful and memorable times along this beach. This recipe has also become a family favorite.

St. Teresa Crab Casserole
serves 4-5

1 pound lump crabmeat
2/3 cup mayonnaise
1 tablespoon Dijon mustard
1 tablespoon Worcestershire sauce
1 1/2 tablespoons fresh lemon juice
3 dashes Tobasco
1/4 cup milk
1/2 teaspoon kosher salt
1/2 teaspoon pepper, freshly ground
1 cup saltine cracker crumbs
1/4 cup butter

Preheat oven to 350 degrees.

 Carefully pick crabmeat to remove any shells without breaking up pieces. Prepare sauce with mayonnaise, mustard, Worcestershire sauce, lemon juice, Tobasco, milk, salt and pepper. Mix well; add crab and 1/4 cup cracker crumbs. Pour in a buttered 6-inch baking dish or individual reamkins. Top with remaining cracker crumbs and dot with butter.

Bake for 25 minutes or until a little golden brown on top.

You could probably substitute panko for the saltines but I love the additional saltiness of the saltines.

The butter dotted on top helps it to brown plus a little added flavor.
There are many Crab Casserole recipes but this one is my favorite mainly because I love the taste of crab and I don't care for a lot of ingredients that over power the wonderful taste of our delicious blue crabs.
It is quite simply delicious especially pared with some fresh in season vegetables and a good bottle of your favorite white wine.

I am linking this post to Foodie Friday.

Thursday, October 13, 2011

Creamy Pasta Salad

A couple of weeks ago I went to my first Garden Circle meeting of our new year. This meeting is always one that everyone brings a salad of some kind since most of us had not seen each other over the summer. We like to linger for a while and enjoy some wonderful recipes. It is always fun trying a little of this and a little of that and as you can see we had quite a wonderful selection.


 I had recently seen on one of my favorite blogs a  recipe for Creamy Pasta Salad. It was Susan at Savoring Time in the Kitchen who had shared this recipe. It was quick, easy and everyone at our gathering seemed to like this pasta salad.

Creamy Pasta Salad


8 ounces dry pasta (I use bows - Farfalle)
1 15-ounce can garbanzo beans, drained
6 ounce sliced black olives, drained
1/2 cup chopped green onions
1 cup shredded carrots
1 cup thinly sliced green peppers
1 cup seeded and quartered cherry tomatoes
½ cup sliced radishes
1 16-ounce jar good produce-section reduced fat Ranch Dressing
1 Tablespoon fresh basil, chopped
1 Tablespoon fresh oregano, chopped
1/2 teaspoon minced garlic or 1 teaspoon garlic powder
2 Tablespoons fresh parsley, chopped
1/2 teaspoon dried red pepper flakes
1/3 cup freshly grated Parmesan cheese

Cook and drain pasta according to directions on package. Cool under cold running water. Mix with the rest of the salad ingredients and chill.

My Notes: I put this together the night before and saved out some of the dressing to add just before serving.


It was a great combination of flavors with lots of fresh ingredients. Susan had mentioned on her blog that she had used Maria's light Ranch dressing but I had just come across a Creamy Ranch dressing made by Stonewall Kitchen and used it instead. It was a delicious dressing, not over powering and was a perfect substitute. I am always looking for new ideas for a cold pasta salad and this I really thought was excellent. The sliced radishes and red pepper flakes gave it a little kick. Thank you Susan for sharing this recipe.
Now on a different note I have a few new pictures of my newest grand baby to share. She is now three months old and just the light of my life.

I am linking this post to Foodie Friday.

Tuesday, October 4, 2011

Pork Chops Shepherd-Style

One of my favorite TV chefs is Lidia Bastianich. Her program is so much more than a cooking program in that she cooks from different regions of Italy and also takes you to the area. Often her daughter who is an art history professor appears on the program talking about that areas art and architecture. Her son, Joseph, also appears on the program from time to time and he owns wineries in Italy. His business partner is Mario Batali.

The recipe I am sharing today was one that came from Lidia's book, Lidia Cooks From The Heart of Italy. 
This particular recipe comes from the region of Calabria in Italy, a region in the most southern tip of the boot. It is surrounded by coastline and inland the terrain is very mountainous.

I love pork and this recipe uses nice thick pork chops. It was a very satisfying dinner and oh so delicious.


Pork Chops Shepherd-Style
serves 6

6 bone-in pork loin chops, about 1 inch thick, 6 to 8 ounces each
2 teaspoons kosher salt
1/2cup all-purpose flour, for dredging
3 tablespoons extra-virgin olive oil
4 medium onions, halved and thinly sliced (about 4 cups)
3 plump garlic cloves, sliced
6-ounce chunk provola or provolone, preferably imported from Italy
1 cup white wine
1/3 cup grated pecorino

Recommended Equipment: A heavy-bottomed ovenproof skillet or saute' pan, 12-inch diameter or wider.

Trim excess fat from the pork chops, leaving only a thin layer on the edges. Season both sides of the chops with 1 teaspoon of the salt. Spread the flour on a plate, and dredge the chops, lightly coating both sides.

Meanwhile, pour the olive oil in the skillet, and set it over medium heat. Shake excess flour from the chops, and lay them all in the skillet in one layer (depending on the size of your pan, you may have to snuggle them in). Gently brown the pork on the first side, about 4 minutes; turn the chops over and brown the second side, another 4 minutes. Remove the chops to a plate and keep warm.

Scatter the onions and garlic in the skillet, stir them around the pan, season with the remaining salt, and cover. Cook the onions slowly, stirring occasionally, and scraping the pan bottom to mix the crusty browned bits with the onion juices.

Meanwhile, if you'll be finishing the dish right away, set a rack in the middle of the oven and heat it to 400*. Slice the provola in 6 or more thick slices about the size of the pork chops.

After the onions have cooked for 15 minutes or so, and are quite tender and colored with the pan scrapings, uncover, and push them all to one side of the skillet. Lay the pork chops back in, one at a time, spooning a layer of soft onions on the top of each chop. When they're all in the pan, lay the provola slices over the onions.

Raise the heat, and when the meat is sizzling again, pour the wine into the skillet (in the spaces between the chops, not over them). Swirl the pan so the wine flows all through it, and bring to a boil. Sprinkle about a tablespoon of pecorino on each chop, then carefully move the skillet from the stove to the oven.

Bake the chops for 10 minutes or so, until the cheese toppings are bubbly and crusty. Carefully remove the skillet from the oven, and let the chops rest in it for a few minutes. To serve, lift out each chop with a spatula, keeping the cheese topping intact, set it on a dinner plate, and spoon some of the skillet juices and onions around it.


There are a lot of onions in this dish nestled in between the the pork chop and the cheese and I wasn't sure I would really like that but it was absolutely delicious. I will definitely prepare this recipe again.
I served this over a bed of fresh fettuccine simply pared with sliced tomatoes that had a drizzle of basil infused olive oil and  sprinkled with an Herbed Sea Salt. The wine sauce was amazing as well.

I served an Italian Chardonnay that I had also used in the dish. I think since Fall has arrived for most of the country, this would make an excellent Fall dinner.

I hope you will try this dish, it was simply delicious.

Sunday, October 2, 2011

Reprise~New Orleans Seafood Gumbo

Chari at Happy To Design is hosting a blogging party, Sunday Favorites. It is a repost of one of your favorite blog posts and this particular recipe is one of our family's favorites. Next week is one of my son's 38th birthday and for our family celebration I decided to prepare this delicious recipe which is just chocked full of scrumptious Gulf Seafood. It is also a good hearty meal for Fall.

----------------------------------------------------------------------------------------------------------------------------

Most all Southerners have a good Seafood Gumbo in their cooking repertoire especially if you have roots in New Orleans as I do. Today I am sharing a favorite recipe that I found many years ago, tweaked from my head as I remember the way my Dad prepared it and also learning a thing or two as a result of being a big fan of Emeril's. Unfortunately, my Dad never wrote down a recipe. I was, however, fortunate that he had these amazing family recipes in his head and after watching him many times as a child put together such recipes as Seafood Gumbo, Crab Jambalya using whole crabs in the pot (that was an art in itself), Chicken and Oyster Gumbo, and Shrimp Etoffee, I had a good sense of how to prepare some of these wonderful dishes. I was very fortunate to have a legacy with both of my parents having a love for preparing good food. My Dad who prepared Southern and New Orleans cuisine and my mother who had this passion for preparing French cuisine.


Today I will share our family favorite for Seafood Gumbo.


Seafood Gumbo


1/4 cup oil

6 tablespoons all-purpose flour

2 cups onions, chopped

1 cup green bell pepper, chopped

1 cup celery, diced

3 large garlic cloves, minced

4 cups chicken broth

1 tablespoon chicken base

3 cups water

2 bay leaves

1 1/2 teaspoons dried thyme

1 teaspoon dried basil

1/3 cup dried parsley

1 teaspoon lemon pepper

1/2 teaspoon caynne pepper

2 tablespoons Worcestershire sauce

1 teaspoon kosher salt

1 teaspoon freshly ground black pepper

1 (14 1/2-ounce) can diced tomatoes seasoned with garlic, basil and oregano

4 cups sliced Cajun-style fresh link sausage

4 cups cut okra (fresh or frozen)

2 cups oysters and liquor

1 pound crabmeat

1 1/2 to 2 pounds fresh peeled and deveined shrimp, tails removed

3 cups bay scallops

File' powder (optional)

In a large pot (at least a 6 quart pot) combine oil and flour. Cook over medium heat, stirring constantly, until the roux has browned to a medium chocolate color. Add onion, pepper, celery and garlic. Saute for 2 to 3 minutes, stirring constantly. Slowly add chicken broth and chicken base, stirring as you go. Add water, bay leaves, thyme, basil, parsley, lemon pepper, cayenne pepper, Worcestershire sauce, salt, pepper and tomatoes. Cut sausage into 1/2-inch pieces. Add to pot along with okra. Cover pot and simmer for 1 to 1 1/2 hours, stirring occasionally. Add oysters, crabmeat, shrimp and scallops. Simmer for an additional 15 minutes. Taste for seasonings, S&P. Serve over hot buttered rice. Sprinkle file powder on top of bowl.
------------------------------------------------------------------------------------------------------

The key to any good gumbo is the roux. Here I have shown my roux but this gumbo requires that it be slightly darker.

The vegetables should be sauted until the onions are clear but not burned.

We are so fortunate to be able to enjoy the bounty of the Gulf of Mexico and our area was not affected by the oil spill. Seafood Gumbo is a very easy dish to prepare but it is necessary to stay with it and stir often but soooooooooo worth the effort. It is quite simply delicious.

I personally don't care for gumbo file' but in New Orleans no gumbo is served without gumbo file'. A couple of notes I want to mention, do not add gumbo filet' to the pot because it acts as a thickening agent and is only used as a garnish after it is served. One other tip, if I don't happen to have a good homemade chicken stock in my freezer I always use Kitchen Basics. I have found it to be the BEST.

If you try this traditional New Orleans favorite you won't be disappointed.

Always served over hot buttered rice, I usually pare it with my favorite cornbread, a side salad and a good glass of your favorite red wine, well, it just doesn't get any better than that. Enjoy!

Thursday, September 22, 2011

Prosciutto Mozzarella Pinwheels

I am sharing a recipe from one of Giada's books that I made this past weekend. It was simply delicious and so very easy. Giada is one of my favorite cookbook authors and I do have all her books. Seldom if ever have I cooked from any of her books that I was disappointed.

Prosciutto Mozzarella Pinwheels

Serves 6 to 8

Flour for dusting
1 purchased pizza dough
2 cups shredded mozzarella cheese
7 ounces prosciutto, thinly sliced
1 cup coarsley chopped baby spinach (about 1 1/2 ounces)
1tablespoon olive oil
Kosher salt and freshly ground black pepper

Preheat the oven to 425* and position a rack in the lower third of the oven. Line a baking sheet with parchment paper

On a lightly floured work surface, roll out the pizza dough into a 12-to 14-inch circle, about 1/4 inch thick. Sprinkle half of the mozzarella over the dough. Arrange the prosciutto over the cheese in a single layer. Sprinkle with the chopped spinach, then top with the remaining cheese.

Roll the dough into a thin cylinder, gently tucking in the ends. Brush the entire roll with the olive oil and season with the salt and pepper. Place the dough, seam side down, on the baking sheet and bake for 25 minutes, or until the top is golden brown.

Cool the roll for 3 or 4 minutes, then use a serrated knife to cut it into 3/4-inch wide slices.

We are fortunate enough to have a wonderful Italian deli where I got my pizza dough all ready to roll out but while there I also got some of their Marinara Sauce to dip the rolls in for some added flavor and I didn't have any homemade sauce at the time.

My husband and I made a meal off of this pared with a Mixed Green Salad. These were fantastic and I think would make for a great appetizer when you are preparing an Italian dinner as I often do. They would make a very impressive tray of appetizers.

Have I mentioned that it was delicious. I sent some over to my son's and my daughter in law called and told me, "I don't know what that was but it was FABULOUS"!!! The combination of the flavors was awesome. I obviously didn't have any parchment paper but sprayed my sheet pan with a nonstick spray.

It is once again Friday and I am sharing this recipe with others participating in Foodie Friday, our host is Michael Lee at Designs by Gollum. Take a look at some of the other recipes by clicking here.

Tuesday, September 20, 2011

YaYa Dinner Party

A year ago twelve very good friends organized this dinner party group for just the girls. On occasion we include our husbands but I think we have come to cherish these once a month evenings. You see, when we get together for lunch we are there for a very brief time and then we run off for the next appointment. For dinner we are not likely to do that and we really have the opportunity to chat it up. We call ourselves the YaYa's being the Southerners that we are, well most of us anyway. It just seemed to fit.

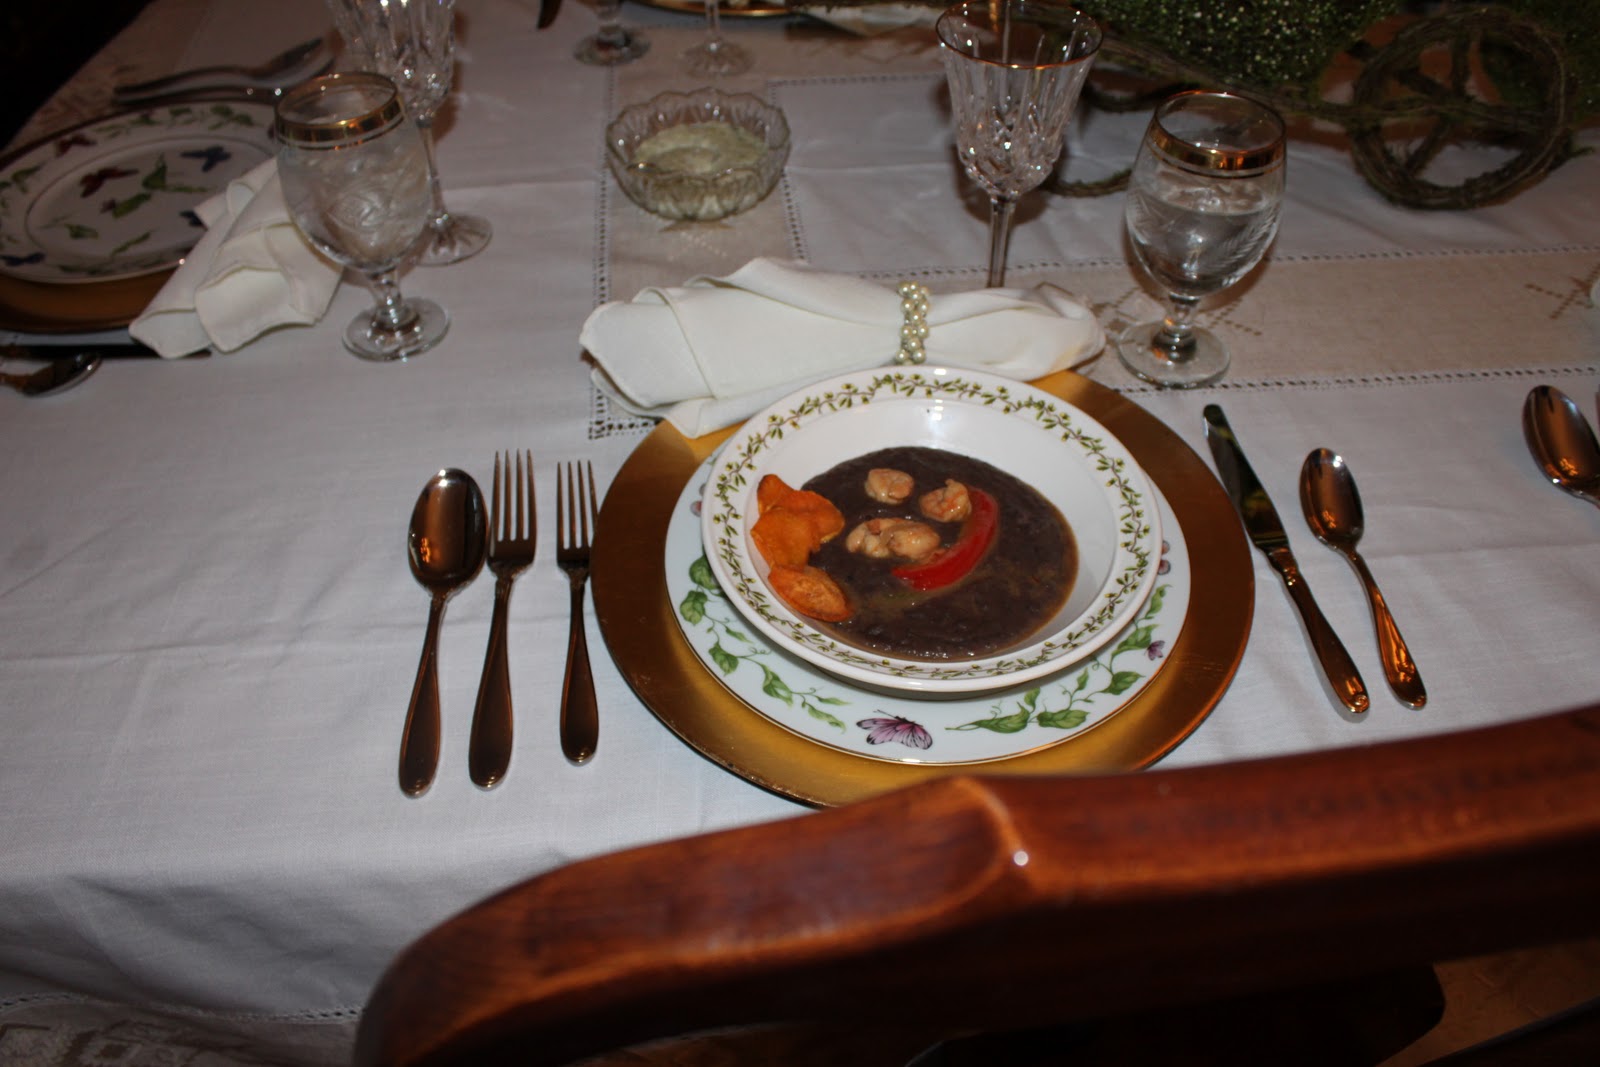
My friend whose home it was in most recently has a dining room certainly able to accommodate all of us as you can see. What a lovely dining room it is as well.
This particular evening it was decided to have two hostesses. The gorgeous blonde was the friend whose home we were in and the other gorgeous lady is our New Yorker friend. She is always loads of fun.

They chose to mix up the dinner place settings using two different fine china patterns.  I think they did a fabulous job.

It was an elegant garden themed dinner party with touches of whimsy in this extraordinarily formal dining room. What I like to call casual elegance.
 Now I ask you, how cute is that? Simple but yet elegant with the moss covered wheel barrow and bird to the side with just a few blooms for added color. I also thought our hostesses tablecloth was exquisite so I asked her where she had gotten it. It came from one of her trips to Venice and was simply the most beautiful tablecloth I had ever seen.
We began our dinner with a Black Bean Soup topped with Shrimp as a garnish. It was so very good and I had hoped to include the recipe but it has not been sent to me yet. This was a recipe I am anxious to make myself since the flavor combination was outstanding. I will post the recipe when I make it myself for the first time.


Dinner was excellent but more importantly the bonds formed with our dinner group is just amazing. We always laugh and laugh lingering after dinner with our dessert and coffee and I didn't get home until 11:00. Our YaYa dinner group, it's a Good Thing. Our hostesses just outdid themselves. Thank you again from me for the time, care, and love that you so obviously put into making sure that your guests thoroughly enjoyed themselves.


Today I am joining Marty at A Stroll Thru Life for Tabletop Tuesday. Have a wonderful day.


I am also linking this post to Tablescape Thursday at Between Naps on the Porch.

Monday, September 19, 2011

My Favorite Fall Dessert

It is Fall even here in North Florida since we are enjoying cooler temperatures in the morning and late evening, almost dusk. We are still experiencing some pretty high temperatures in the 90's in the middle of the day but I do enjoy these cool mornings and evenings.

When it's Fall my head wants something delicious using pumpkin and my favorite are these Pumpkin Bars. They are sooooooooo yummy. You can't eat just one.

Pumpkin Bars


2 cups sugar
1 cup butter (2 sticks), room temp.
2 cups canned pumpkin (1 15-oz can)
4 eggs, room temp.
2 cups flour
2 tsp. baking soda
1 tsp. each of cinnamon, nutmeg, allspice, ginger, ground cloves
1/2 tsp. salt

Preheat oven to 350. Lightly grease a 15 X 10 1/2 X 1 pan.

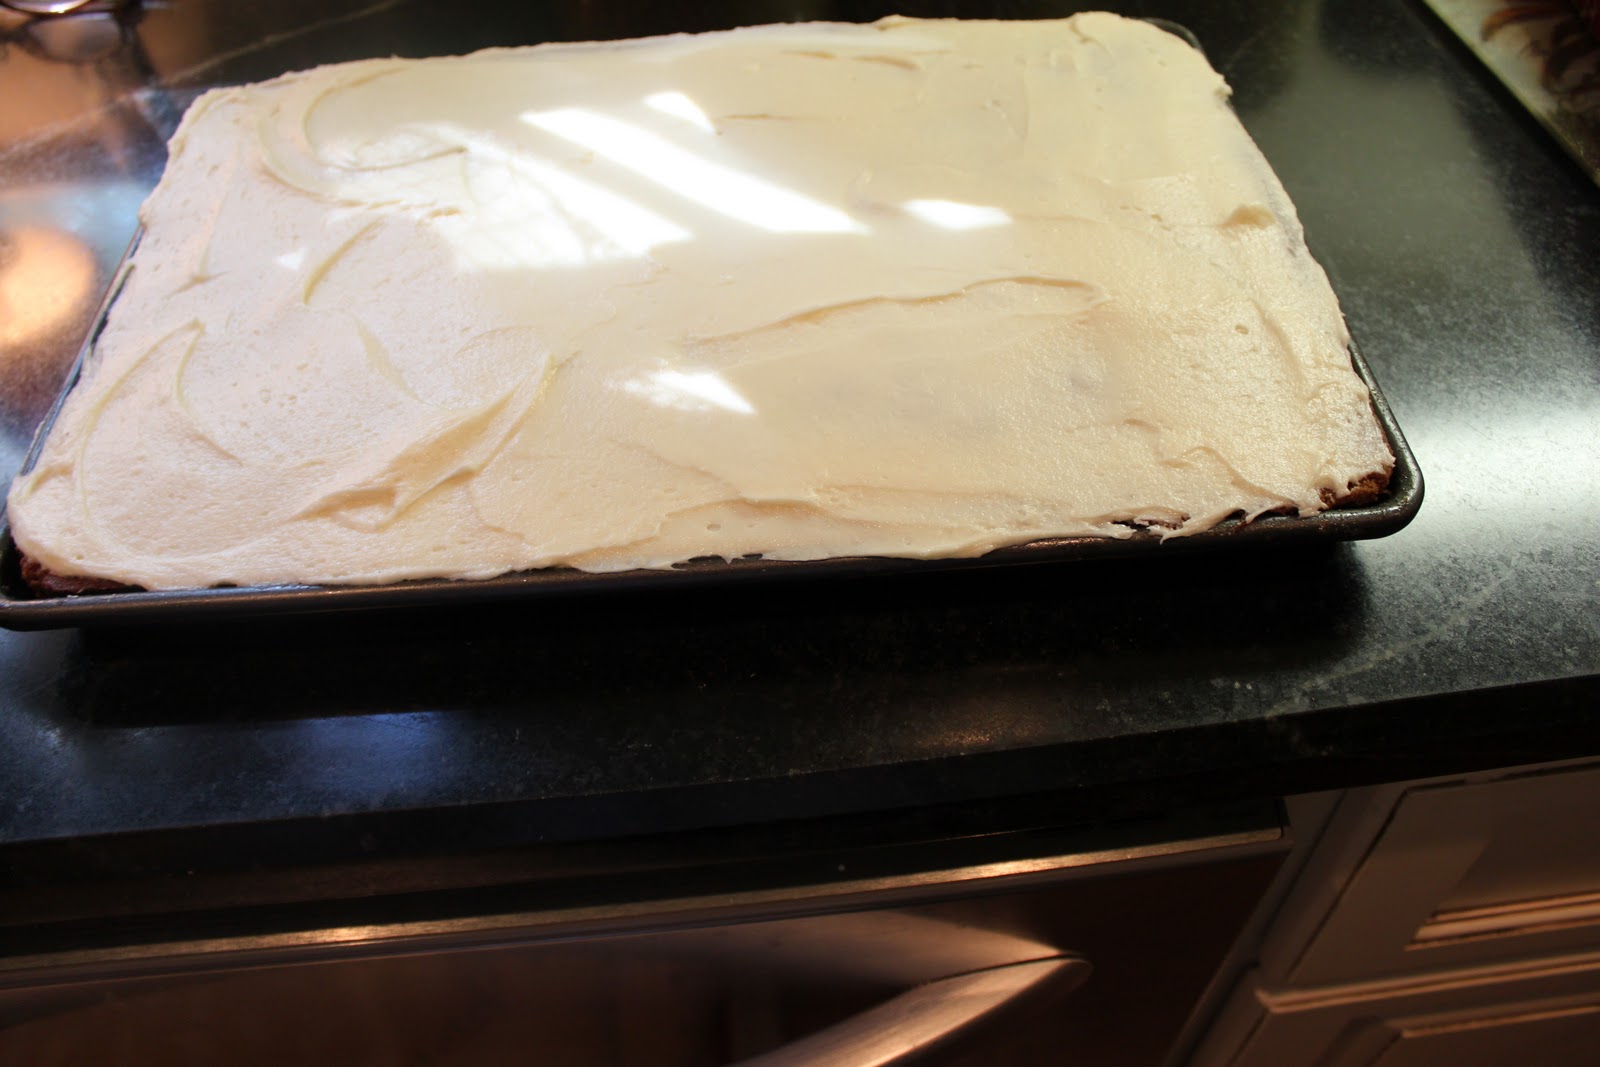
Sift flour, baking soda, spices, and salt together; set aside. Cream butter and sugar until smooth. Add pumpkin and eggs; beat until smooth. Add dry ingredients and mix until well combined. Spread mixture into pan. Bake for about 20-25 minutes or until toothpick comes out clean. Cool completely and frost.

Frosting
3 oz. cream cheese, room temp.
1 stick butter, room temp.
1 tsp. vanilla
2 cups powdered sugar

Beat together until smooth. Frost the cooled pumpkin bars and then cut them into squares.


I always cut them in half, length wise and width wise. then cut them into fourths and go from there to get more even sized bars.

They are a very moist cake like bar and the pumpkin with the spices, wellllllllllllll, they are delicious. It goes together so qucikly but it does make a lot of bars. 
I hope you will try this recipe and come to love them as much as I do. I made these a couple of weeks ago to take to a Garden Center function in our little town but saved out a couple for my husband and myself. I'm thinking I need to make them again soon.

Enjoy and have a wonderful day.